Tuesday, February 8, 2011

A BEAUTIFUL NURSERY

0 Comments


Choosing a theme for your nursery can be a big deal. After all it's an idea that you will probably be married to for awhile. There are many ideas that you need to contend with as you try to determine what to choose for your baby.
The first question in your mind may be a question of gender. Will you do a gender specific theme like fire trucks or fairies? Perhaps you would consider doing a gender neutral theme like Winnie the Pooh or animals in bright colors.
The question of ge
Some parents choose a neutral color for a base of their room. From here they simply add furniture and small decorations that can be changed and moved around as the child grows. This way they can add or remove themes as the whims of the child (or themselves) change.
Items to consider for a themed room:

  • Bedding (Remember safety should trump beauty.)


  • Paint Color
  • Borders
  • Wall Paper 
  • Murals
  • Furniture (Themed or not, expandable or not)
  • Knick Knacks
  • Art or photos

While decorating your baby's room is personal and fun, remember that the heart of your child's room is not what is physically held within the four walls. Rather it is the relationship of the parents and child. So if your baby is born into a room of stark white walls, with boxes crammed in a corner, so be it. It won't change how you love him or her, nor will they grow up decoratively challenged.

Monday, January 17, 2011

CHANGE YOUR HOME DECORE FOR WINTER

0 Comments


It's fun to feel cozy in the winter with warm colors and soft, fluffy fabrics. In the summmer, a cool, airy look is appealing. Read here to get some simple ideas for transforming the look of your home with the seasons.


When the cold weather arrives, have a collection of cozy, fluffy throws to place on your furniture for snuggling. Remove them or replace with soft cotton or silk throws for warmer months.
Remove the toasty down-filled duvet from your bed in the spring and substitute a light cotton matalasse bed cover or a simple cotton blanket.Floral arrangements of pine and holiday colors can be changed for light, colorful ones for the spring and summer. Put away dark brass or pottery containers and bring out clear glass or crystal vases.


Change dark-patterned decorative pillows by covering them with fresh, floral prints or plaids for warmer weather. Either change out the pillows with a second set or alternate the decorative covers.If you have a collection of plates on display, put classic holiday designs away for the winter and replace with pretty floral china from grandma.Have your draperies made so they are reversible allowing you to easily turn them from lively to neutral with the seasonal changes.
Be sure to put garden magazines and flower books out on the coffee table in the spring and summer. That will help bring the outside in and add color to your interior.
Changing with the seasons gives you an opportunity to get out some long-lost pieces and make them the center of attention for a while.The change of decor can come all at one time, like spring house cleaning, or over a period of several days or weeks. You'll be surprised what a difference just a small change can make.
If winter seems especially long, forget the calendar and get your spring things out even if there's snow on the ground. You may still need the warm blankets, but the look can be light and uplifting.


Thursday, January 13, 2011

MAKE COLOURFUL YOUR KIDS ROOM

0 Comments

This summary is not available. Please click here to view the post.

Wednesday, January 12, 2011

CRUNCHY SWEET SNOW MAN

0 Comments


Crunchy the Snowman 

Dressed in colorful candy scarves and top hats, these stylish, easy-to-make snowmen are sure to liven up any holiday gathering.
    Ingredients
  • bag of 8-inch pretzel rods
  • 1 cup white chocolate chips
  • mini chocolate chips
  • orange decorators' gel
  • fruit leather (various colors)
  • gummy rings
  • gumdrops


    Instructions: 
  1. To make a batch, melt 1 cup of white chocolate chips in the top of a double boiler.
  2. One at a time, dip one end of an 8-inch pretzel rod in the melted chocolate and use a plastic spoon or knife to spread the chocolate two thirds of the way down the rod.
  3. Set the pretzels on a sheet of waxed paper and press on mini chocolate chips for eyes and buttons. Use orange decorators' gel to add a carrot nose.
  4. When the chocolate has hardened, stand the pretzels in a mug or glass and tie on strips of fruit leather for scarves. For each hat, stretch a gummy ring over the narrow end of a gumdrop and secure it on the pretzel rod with a dab of melted chocolate.


EGG CARTON FLOWER

0 Comments


The things you need:

1. An empty egg carton
2. Poster colours
3. Brushes
4. Glue
5. Scissors
6. Thick straws

Procedure:
 
Step 1: Cut one egg cup from the carton.

Step 2: Make six to four cuts on the broad part of the cup.

Step 3: Bend and curl the cuts in different ways. Your flower petals are ready and you can make a budding flower or a flower in full bloom by the way you arrange the 'petals'.

, Art & Craft for Kids: 114_3.gif 
Step 4: Stick a thick straw to the bottom of the cup and the flower stem is ready. You could even use a piece of wire for the stem.

Step 5: Now give this flower the shades of colour that you want. The choice is yours - whether you want to give a bunch of roses or a mixed bouquet!

FABRIC FLOWER

0 Comments


For this project, you will need:
  • Pretty fabric
  • Glass or round template
  • Cardboard (just rummage through your recycling bin to find some)
  • Tailor's chalk or a pencil
  • Scissors
  • Needle and thread (choose a thread to match your fabric. I have used black here just so you can see my stitches easily)
  • A brooch backing, safety pin, or plain hair clip...
Instructions:

1.Firstly you'll need to make a circle template to use for cutting out your fabric. Trace around a small glass onto cardboard, and cut out the cardboard circle.


2.Using your cardboard template, trace 14 circles onto your fabric and cut these out.
how to make fabric flowers

3.Here I am using a beautiful raw silk remnant I found in the bargain bin at my local fabric store. It has natural stiffness and is perfect for making gorgeous flowers with.Place two circles of fabric on top of one another, and secure together with a simple stitch. This will be the base of your flower.
how to make fabric flowers

Take four circles of fabric for the next step. Fold each in half, and secure with a small stitch to the center of your base.
how to make fabric flowers


4.With the remaining eight fabric circles, fold each into quarters and secure with some stitches at the base.
Sew four quarters into the center of your base. Now stitch the last four quarters into the center and tie off underneath.
Fluff up your "petals" and you're done!
how to make fabric flowers

You can use this flower on your dress,using it for gift wraping,make necklace and place it in a vase 

Tuesday, January 11, 2011

POLYMER CLAY BAKED SNOWMAN

0 Comments


Project Materials & Tools:

  • Penny
  • Cotton Ball
  • Toothpick
  • White or Clear Glue
  • White, Black, Red, & Orange Polymer Clay

Project Instructions:

1. Assemble snowman pieces
Form the colored clay pieces into the basic snowman shapes (body, eyes, mouth, nose, hat, scarf) as indicated in the photo above.


2.Begin building the snowman.
Using the penny as a base, begin putting together the snowman. Start at the bottom and assemble the base to the penny, followed by the mid-section to the base.

3. Make the snowman head.
Assemble the nose and eyes to the face before attaching the head onto the mid-section. Insert the nose into the head before adding the eyes and mouth.
Use the toothpick to create a deep hole in the head for the "carrot" nose. As you insert the nose into the hole, shape it into a point.

4. Dress the snowman (hat and scarf).
Next, assemble the black hat pieces on the snowman's head. Shape the hat in any way you see fit. Then, wrap the red scarf around the neck and curl up the ends for a "flowing" effect.

5. Bake the snowman.
Place the snowman onto a piece of tin foil and/or in a shallow baking pan and bake for 10-15 minutes at 275 F degrees (baking times may vary, so refer to the directions on your clay packaging for the best results). After baking, let the snowman cool completely.
If any of the pieces come apart after the snowman is baked, use the glue to reattach the pieces together.

6. Assemble the cotton "snow" in 3 easy steps:

1.Using the toothpick or your fingers, separate the cotton ball center to form the shape of a ring that can be slipped over the penny base of the snowman.
2.Add a few beads of glue on the penny base.3.Slip the cotton ring over the base to cover the penny and glue beads. After positioning the cotton over the base of the snowman, press it gently and flatten down evenly.

Allow the glue to dry completely.
Congratulations! Your snowman is finished.

Sunday, January 9, 2011

DECORATIVE ICE CREAM MADE BY FOAM

0 Comments


Required item:

1.brown,dark pink, light pink, yellow and brown fun foam.
2.pink, white, yellow and brown dimensional paints and glitter.
3.glue for fun foam.

Instructions for ice cream cone:

1. Print out the Ice Cream Cone Template and trace around each marking with a pencil. Turn the paper around and you should be able to see the markings through the paper. Now place the paper over the appropriately colored sheets of fun foam and retrace the markings you see onto the foam. Cut out the pieces.
2. To make the sparkly cones you will then use the dimensional paint to decorate the ice cream in the appropriate color. On the cone you can create a waffle look by first drawing stripes parallel in one way and then drawing stripes perpendicular to these.
3. Sprinkle same color sparkle over the dimensional paint outlines and tap off the excess glitter. Let the paint thoroughly dry.
4. Once dry, you can glue the top of the ice cream to the bottom cone piece.

TISSUE PAPER CARNATION FLOWER

0 Comments


You will need:
  • Tissue paper
  • Scissors
  • 2 large paper clips
  • Pipe cleaners (chenille stems) or floral wire
  • Coloured marker pen
  • Optional: floral wire, floral tape, wire cutters

How to do it:

1.You can make your carnations any size, but I found that a 3″ (7.5cm) circle gives a realistic-sized flower. Fold your tissue paper in half again and again until it is just larger than your circle size. I used a 20×24″ sheet of tissue paper, which let me cut 48 circles at once – enough for 4-5 carnations!

2.Find a suitably-sized circular container and draw around it with a pencil onto your folded tissue paper. 
 
3. Start to cut out the circle, holding all the layers of tissue paper together. If you can’t cut through the whole thickness, try cutting half the layers at a time, then draw another circle to cut out the other half. I found that I could cut through 48 layers with no problem, as the tissue paper is so thin. You don’t have to cut too exactly, so don’t worry if some of the layers don’t come out as perfect circles. Use a large paper clip to help keep the layers together.


4. As you continue to cut, add a second paper clip on the opposite side of the circles to keep all the circles together.


5. This next step is the key to making the flowers look more realistic than standard tissue paper flowers.


6. Take a marker pen with a complementary colour (a cheap kids’ pen is fine). A bold colour will give a more effective result. Use your non-writing hand to hold the edges of all the tissue-paper layers together, and use the side of the pen nib to begin to gently colour the edge of the circles.


7. Take this slowly – if you press too hard, the tissue paper layers will separate. Colour a small section of the edge at a time, and go over each section a few times to ensure the colour is intense and the ink has saturated all the edges.


8. Continue to colour around the edge. When you are about halfway through, move the paper clips to areas you have already coloured, and fill in the gaps.9. You may well end up with a coloured finger by the time you have finished , as you have to hold the papers close to the edge to keep them together while you colour them! Don’t worry – it’ll wash off .


10. Remove the paper clips and select enough circles from the pile to make one flower. I used approx 12 circles per flower, but 8-10 circles would be fine.


11. Keep these circles together and poke two holes near the centre of the circles. I used the end of a pipe cleaner to do this, but if your pipe cleaners aren’t sharp enough you could use a large needle or similar.


12. Fold down about 1 inch of the pipe cleaner, and push the long end through one hole and the short end through the other hole.


13. Pull the ends all the way through, then twist the ends of the pipe cleaner together underneath the flower to keep all the circles together:


14. Now to make the petals. Separate the topmost circle and crumple it upwards from the centre. Scrunch up the paper randomly, but try to concentrate on the base of the petal (the centre of the circle) and leave the coloured edges alone.


15. Now repeat with each circle in turn. Crinkle each circle up individually, and try not to have the folds in the same place each time.


16. Keep scrunching… When all the circles have been crumpled up, you will end up with a lovely carnation like this:


17. Make a double-headed stem by cutting down one pipe cleaner to half its length (use wire cutters for this) then twisting it together with another completed stem: 


18. Cut the floral wire to the same length as your stem.


19. Holding the wire and pipe cleaner stem together, start to wrap the floral tape tightly around them. Start about 1″ down from the flower head (below, left) and wrap up the stem to the head. Then wrap all the way down the stem to the bottom. To wrap without the tape getting tangled up, hold the tape steady and at an angle to the stem with one hand (below, right), and use your other hand to twirl the stem around, winding the tape around itself as it goes.


20. The floral tape will stick to itself, so there is no need to use glue to fasten it down. Remember to stretch the end of the tape as you wrap the end of the stem, to help it to stick securely.


21. Make just one as a paper buttonhole. Make about a dozen, and you have a beautiful bouquet!


22. I hope you enjoyed this tutorial! If you make any tissue paper flowers.

CREPE PAPER FLOWER

0 Comments


Things You'll Need:
  • Crepe paper
  • Ruler
  • Scissors
  • Green pipe cleaners

Instructions:


  1. Stack five sheets of crepe paper on a flat surface. You can use the same colored crepe paper throughout this project, or you can layer different colors for a unique look. Work in a well-lit area so that you can see what you are doing.
  2. Measure an 8-by-8-inch square of crepe paper with your ruler and cut all the layers with your scissors. This is a great activity for children, but supervise them when they are using scissors.                 Make a 1/2-inch fold in the stack of crepe paper. Run your finger along the fold to create a crease. Hold the new fold tight and flip the crepe paper over. Fold the crepe paper you are holding backwards to create a second fold. This is called an accordion fold. Continue in this manner until you reach the end of the crepe paper.
  3. Fold the crepe paper in half by bringing the two short ends together. Do not make a full fold or crease. You are looking for the center of the paper.Cut a tiny V-shape on each side of the fold.
  4. Wrap one end of a green pipe cleaner around the middle of the paper (where you made your tiny cuts) and then twist it around itself where the pipe cleaner meets the underside of the flower. This will secure the pipe cleaner stem to the crepe paper flower. The long end of the pipe cleaner should be pointing down.          
  5. Pull the ends of the crepe paper up, and then begin to open the layers inside by pulling them out gently. Work with the layers, pulling and lifting them, until you are satisfied with the look of your flower.

POTTERY PAINTING

0 Comments


Things you will need:
  1. A clay pot,
  2. suitable paints in various colours (we usually just use poster paints),
  3. small paintbrush,
  4. a container with clean water,  
  5. lots of newspaper to save your table from being painted.
  
Instructions:
 1.  Wash the clay pot in warm soapy water to remove any traces of dirt or grease.
   
2.Cover the table or painting area with newspaper, find paints, paint brushes and a mug of clean water (to clean the paint brushes when swapping colours).
   
3.When the pot has dried, start painting whatever design you like!

4.Ensure each layer of paint dries thoroughly before adding another colour on top.

5.Allow the painted flower pots to dry out.
And hey presto! you have delightful one-of-a-kind painted claypot!                                                                                

Tips:
Since clay pots are porous, they do dry out very quickly by themselves, but to hasten the process, pop them on top of a radiator, on a sunny window ledge or in the cool oven of an Aga or Rayburn.

RAINBOW POT PAINTING

0 Comments

                                                                                                        
Materials Required :
  • Enamel Paints (Different Colours)
  • Brush
  • Water
  • Container
  • Earthen Pot
Procedure : 
  1. At first, colour your earthen pot with any enamel paint.
  2. Now take a container containing three-fourth quantity of water and spill different colors of enamel paints into it.
  3. The different colour paints float on the water.
  4. Now gently hold your painted pot at its edge and dip it into the water and twist it around, in the water and slowly take it out of the container.
  5. Keep the pot aside without disturbing it.
  6. The wet paints will slowly take its own design and shade.
    Wait till the pot dries.
  7. Your pot painting is ready.

Friday, January 7, 2011

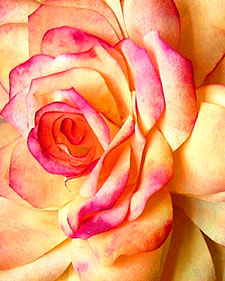
ROSES MADE BY COFFEE FILTER PAPER

0 Comments

Paper Roses
Tools and Materials:

1.Box of disposable cone coffee filter.
2.Scissors  .                                                                                                    3.16-gauge floral wire.
4.Floral tape.
5.Water color paint.
6.Flat brush.
7.Bamboo skewer.
8.Glue stick.

Coffee Filter Roses How to do it: 

1. Trace and cut petal shapes through both layers of filters, as per templates.
2. Form rose. With coffee filter No. 1, take four connected petals and poke an 18-inch length of 16-gauge floral wire down through the center of the bottom of one end petal so 1/2 inch of the wire remains sandwiched between two opposite petals.
3. Wrap adjacent two petals tightly around first two petals; wrap with floral tape around base, then 1/2 inch down wire, to secure.
4. When working with floral tape, pull it as you work to expose the sticky part of the tape.
5. With coffee filter No. 2, take four connected petals and sandwich "flower bud" between two opposite petals. On the adjacent petal pair, gently tear the perforation of the base so that you have a strip of 2 side-by-side petals. Wrap this petal strip around the other two petals and secure with tape.
6. With coffee filter No. 3, take four connected petals and gently tear the perforation at the base to create a strip of four petals. Wrap this petal strip around flower bud and secure with tape.
7. With coffee filter No. 4, gently tear the perforation at the base of petal shapes to create a strip of five petals. Wrap this petal strip around flower bud and secure with tape. (The folded petal gives rose stability and a more rounded form.)
8. With coffee filter No. 5, place three petals, overlapping slightly on rose and wrap just once (to avoid bulk) with floral tape to secure.
9. Wrap remaining three petals opposite the first three. Repeat for shapes cut from filters Nos. 6, 7, and 8. Use finger and thumb to separate petals, creating air pockets and making petals curve outward from the base. Use 3 or 4 extra single petals to fill in holes and give a rounded shape.
10. To paint the roses, use watercolor paints, mixed with a bit of water. Paint the base color, first doing the bottom, then the top, working from the inside out. Accentuate with a darker color on the tips. Use a flat brush to apply a third color of undiluted watercolor to edges. Let dry overnight.
11. Once painted roses are dry, curl left and right sides of outer petals around a bamboo skewer to create a point. Work your way from the outside to the inside of rose. Curl inner petals just slightly by wrapping top straight down around bamboo skewer.
12. Add five paper sepals secured with floral tape to short stem. Wrap floral tape in a spiral down wire stem several times to create a thick roselike stem. Burnish stem with skewer to smooth tape. Cut 6 paper leaves and sandwich a 4-inch wire between. Use a glue stick to stick 6 leaves together with a 4-inch wire stem.
13. Secure leaves to stem with floral tap.